Getting Started

Be Seen. Get Hired.

Thank You For Choosing IntroVideo To Create Your Personal Branding Video

The purpose of intro|video is to help you connect with recruiters and employers by presenting your professional skills and showcasing your communication style. 

While intro|video is not a video resume, it is your personal branding message, a first-impression video and an opportunity for others to learn about who you are and what you do.

Whether you’re an accomplished public speaker or, like most of us, need a little help getting across our message, we guide you through each step and help you communicate your message via video.

Incorporating an intro|video into your networking strategy is easy. With a few clicks, you’ll be able to use your video on your LinkedIn or other Online ProfileEmail Signature, and Resume. We also provide a Personal Branding Page along with a Personal URL

Let’s get started, and please reach out with any suggestions.

Thank you for your time.

The IntroVideo.biz Team

Click Log In

First, navigate to the IntroVideo.biz home page at https://introvideo.biz

In the upper left, click Log-in, or you can do directly to the log in at https://introvideo.biz/login/

Go To Your Dashboard

Your email is your username.  If you already have an account, fill in the info and click ‘Log In‘.

If you need to purchase a video, click ‘Sign Up/Purchase’ to proceed to signup and select a type of video to purchase. 

Note: If you have any issues, reach out to us at info@introvideo.biz.

Task Bar | IntroVideo Navigation

Follow this navigation bar to proceed through the intro|video process. This will also be where you can access your videos and branding pages upon completion.

Step 1. The Dashboard: Client Account Information

This is your current account information.  You can select the specific project (if you have purchased additional projects) or you can buy additional projects here.

Step 2. Video Information

Once you log in, your dashboard has all the sections you need to complete your video.  Enter your Name and other info that you want to appear on the video or your branding page or both.

You can modify your virtual URL to your branding page and you can also add your own logo and social media information and links to your LinkedIn account.  Don’t forget to click Update.

Step 3. Questionnaire

Select one of our questionnaires. We have a variety of questionnaires that may pertain to your situation. 

The goal of this video is to show your warmth and competency.  Our questionnaires (and interview process) aim to help this come across in the final product.

The Questionnaire is a critical part of the process of creating your message.  With only about 40 seconds to deliver your message, you need to make every word count.  In this time limit, you have enough time for 4 key points and what we call your close.  

The questionnaire is the basis for your ‘script’ so you will need to think critically about your answers.  Answer the first question (your “close”) and pick 5 other questions to answer.  Answers are best kept to 1 or 2 short sentences (under 15 words total).  Remember, you will be saying this to the camera, so short, sweet and to the point works best.  As we say, think Haiku, not Novel

We have provided some ‘starter sentences’ (just click to use), if you need a starting point, but we want you to answer in your own voice.  Each answer should be a complete sentence, or 2 short sentences.  A few days after you complete the questionnaire, our editors will look over your answers and offer some revisions aimed at increasing impact.

Step 3A. Answers

The purpose of these questions and the video in general is to show who you are and what you do.  It is important to keep in mind who your audience is – potential recruiters and employers.  They are looking at you and the video to see how you and your talents can help them, and would you be a good fit for their company culture.  A good to approach for you is to view each answer as an opening for them to see your motivation, personality (warmth and energy,) and make it easy for them to see that you would work well on their team.

We would love to hear about everything you ever accomplished since age 18, however, these answers are not the correct forum for you to speak about that.  Rather, keep the answers at a high, conceptual level, but not too generic.  Too generic:  “I’m looking to accomplish great things in business.” And not too specific.  Too specific:  “I’m really great at applying distributed statistical predictive models on Q3-Q4 Budget vs Actual reports from foreign sovereign wealth funded B-corps.”   A better level of specificity is: “With my experience in statistical modeling, I’m looking to help non-profits solve their real-world logistical problems through creative, data-driven solutions.”

The answers need not focus on a specific job, but need to be focused on your warmth, personality, work style, and the benefits you can provide to an organization.

Format:
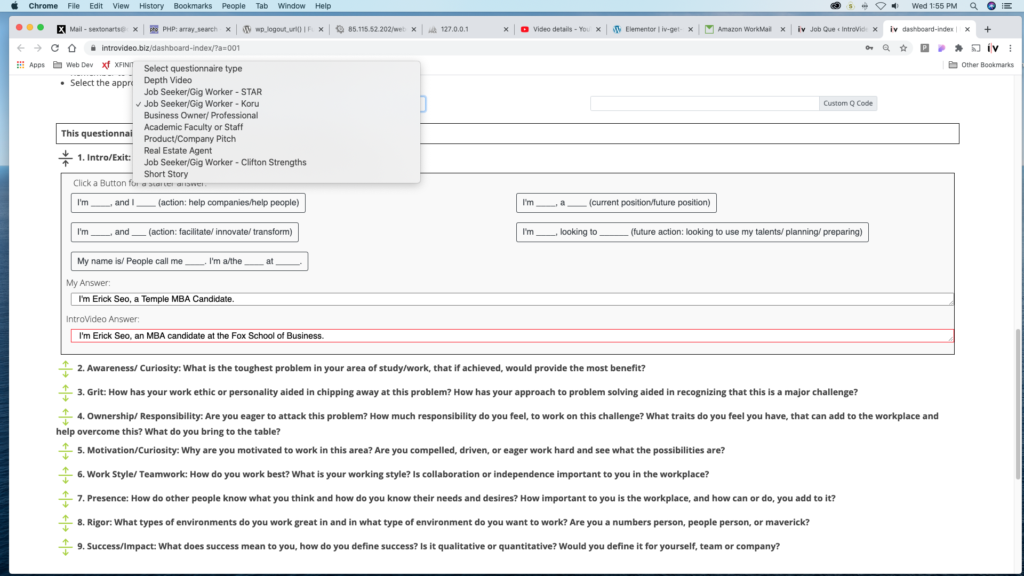
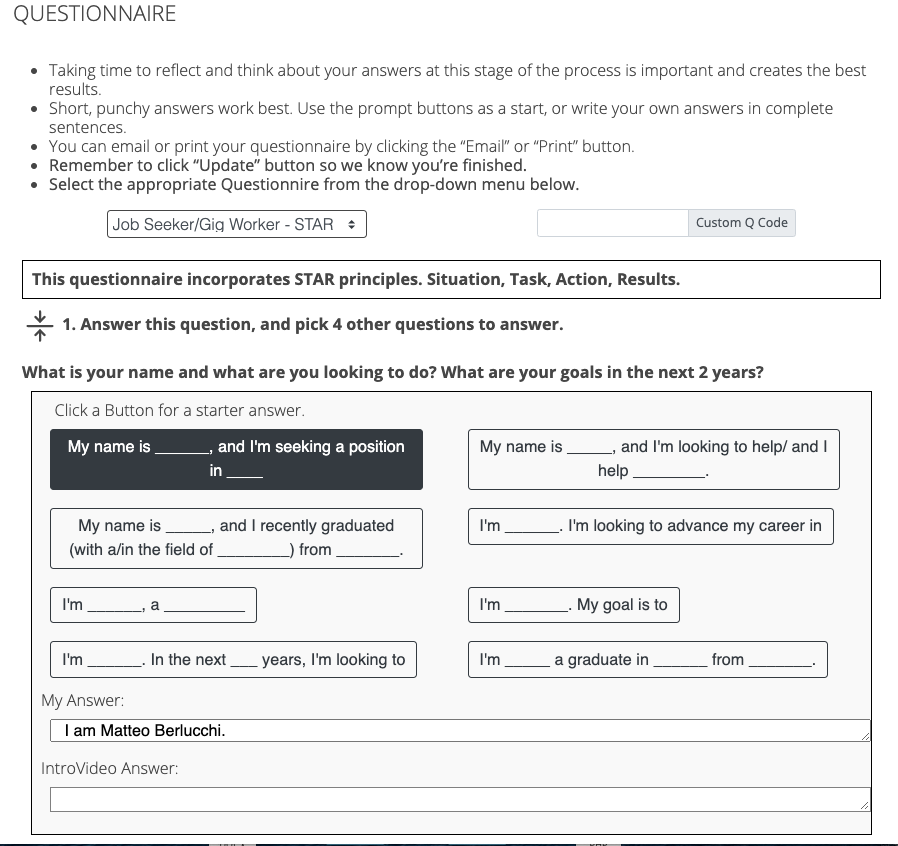
The first question is the easy one, and we use it at the end.  It’s the “close” – who you are and what you are looking to do.

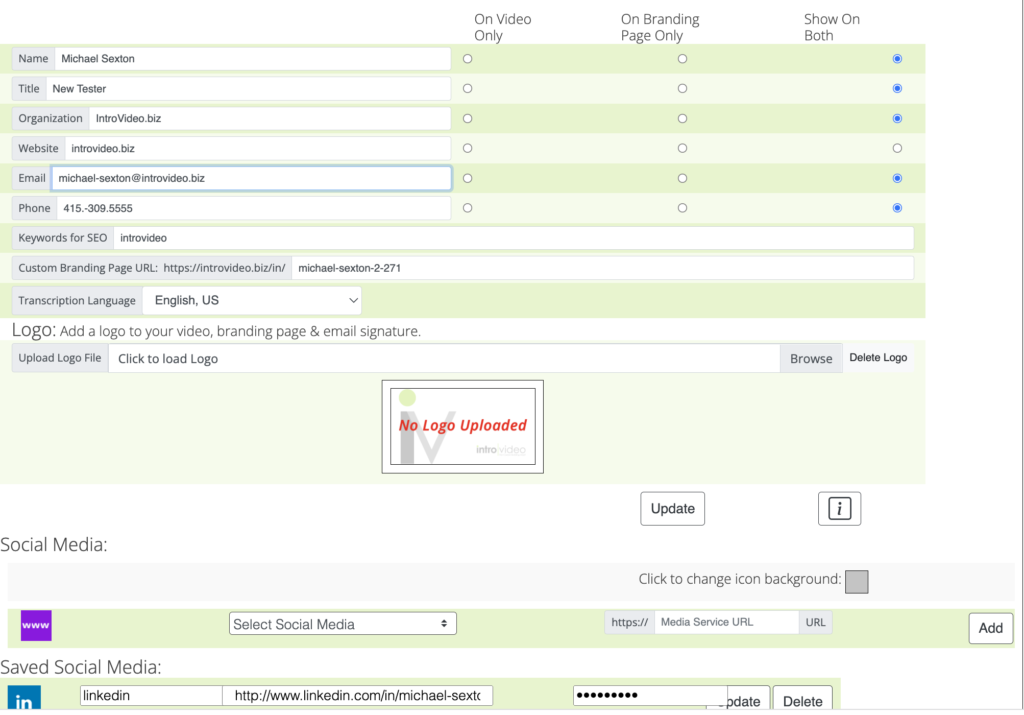
All of the questions however, have the same format.  The green icon to the left will open or close a question. There are several optional “starter” answers that will help direct you to answer the question in a focused format.  However, the best answers come from your own voice.  Authenticity is key.  The more thought you put into the answers, the better.

There are no wrong answers.  Rather, there may be stronger ways of getting your point across.

After you type in your answer, read it out loud. Then try to say it out loud without reading it. You will not have to memorize the entire script, or even an individual line, so don’t worry.  But, test how easily the words flow, and how authentic they sound.  Change or modify your answer, if you need.  Often the best way to make an answer better, is to make it shorter, or break it up into two short sentences.  We know from experience that is it is more difficult to say an answer than to write it, so make it easy (and better) by not adding unnecessary complexity.

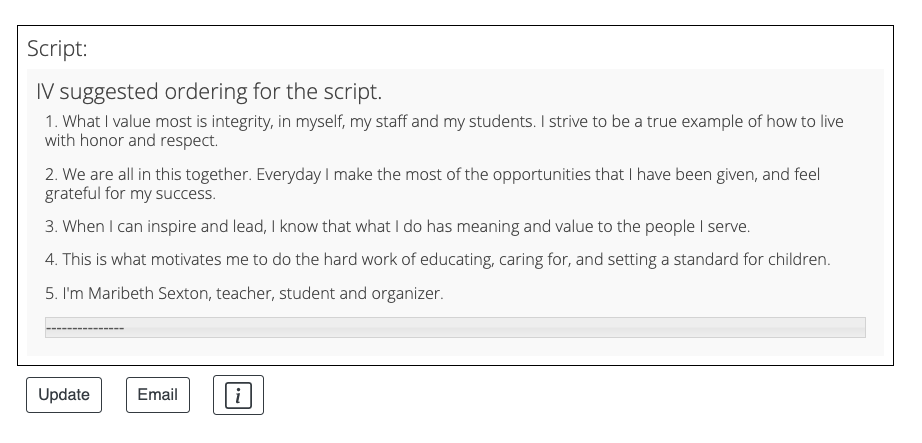
Our editors will review your answers a few days after your initial ‘Update’.  You will see our ‘suggested’ answers below your answers on the page, and also, there will be a ‘script’ at the bottom.

Step 3B. The Script

The script is an ordered sequence of your 4 most critical answers along with your close.  

You can go back and modify your answers, but depending upon the schedule, we may not be able to give you a completely new version of your script before the shoot date.  We can make some modifications before we start the interview, but it’s best not to try to rewrite the entire script.

At filming, we will go over the script, make minor changes if necessary, and then use this on camera.  We will coach you on how to present yourself to the camera, and then we will go over the script line by line, with our interviewer saying the line, then having you repeat it back to camera.  After running through the script several times, we’ll have enough great takes to make you look your best. It’s that simple.

Step 4. Appointment

Make an appointment to set up a time for the interview.  You can change this, just give us a day or so heads-up. 

Step 5. The Interview

It’s good to practice the script a few times before the appointment – but don’t stress – you don’t have to memorize any of it!  Our interviewers are trained to help you look and sound your best.

At your appointment time, click Step 5. Interview.  This brings up the interview page.  Select your camera and mic and click ‘Connect with Interviewer.’  This ‘dials up’ the interviewer.  At the interview, we’ll go over the script and see if you want to make any changes. Then we’ll go over the script a few times while recording.  Don’t worry about messing up, we’ll make sure we have some great ‘takes’ of the answers.

We’ll also take a few photos to get some headshots to use. 

How to look your best:

We love natural lighting!  Sitting in front of or off to the side of a window with indirect light makes for a great video setting. It is best to avoid direct sunlight or having an unshaded window in the background or having sun on the walls in the background.  In the evening or early morning, you may have to have a light in the room.  Its best if the light is slightly off to one side and the background not too dark.

The best place to have the interview is in a small, clean, quiet room.  For professional appearances, the room must be clean.  We all love sneaking a peak at another person’s home, so make them jealous!, or at least let them know that you are tidy and organized, the way that you would be in a professional setting.  But don’t worry if you don’t live in mansion in Beverly Hills, they don’t either.

You also want to come across as tidy and professional.  Wear what is appropriate, but comfortable.  And no need to put on extra jewelry or makeup.  What is most important is that you come across as personable, professional and real.

Thats it!  We’ll work hard to get out to you a video where you look and sound great. We’ll send you an email when you video is completed, and let you know how to best use the video to effectively communicate who you are, what you do and the value to bring to the table.

Step 6. Links & Branding Page

This is where you can create/modify and save your Branding Page.  First, select the Branding Page Template from the menu.  Then Select the Available Video Type from the menu.  Some types of videos may work better in different branding page templates. 

You can modify the branding page by clicking on a section, changing the text or clicking on the paint bucket icon and changing the background color.  Clicking on the painters palette, changes the theme colors.  You can also toggle the QR code on or off.  Explore and add additional sections if you want.  Don’t forget to ‘Save’ to complete the branding page.

This is where you can choose an Email Signature template, or modify your signature.  Don’t forget to ‘Save’ and ‘Preview & Copy’ your signature to use on your email program or add to a cover letter.

Additionally, you can use these links to reference your page, importantly, your Custom Branding Page URL to get see your page directly or embed a reference to it directly. (You can modify your Custom Branding Page URL on the ‘Step 2. Video Info’ section.)  You can also embed the video directly to a Team or Bio page with this embed code.

Finally, you can download your video directly in this section, or download Headshots and Thumbnail images here.  These are great for embedding a reference to your video on a cover letter, resume or other document.